Online Violin Lessons Surrey BC – Learn Violin from Home with Lessons for Violin
Are you searching for online violin lessons Surrey BC? At Lessons for Violin, I offer flexible and personalized online lessons designed to help students of all ages learn the violin from the comfort of home. Using WhatsApp video calls, I guide beginners and experienced players alike through structured lessons that focus on technique, posture, and musical growth.
Flexible Online Violin Lessons in Surrey BC
My online violin lessons Surrey BC are ideal for students who want the convenience of learning at home without sacrificing quality. Each lesson is tailored to the student’s level, goals, and pace. You’ll receive clear, step-by-step guidance, practice assignments, and feedback in real time, all through WhatsApp.
Occasionally, in-person lessons are scheduled to ensure proper posture, bow hold, and hand positioning, which are essential for long-term success. These brief in-person sessions help reinforce good technique and prevent bad habits from forming.
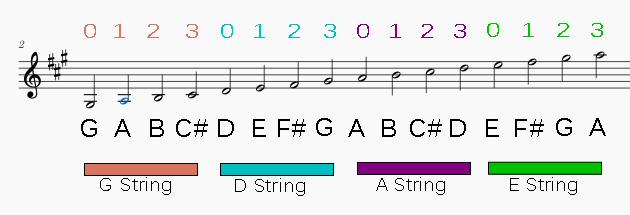
What You’ll Learn in Online Violin Lessons
Whether you are a beginner or looking to improve, my online violin lessons cover:
- Proper posture and bow technique
- Note reading and music theory fundamentals
- Intonation, rhythm, and tone development
- Fun songs and exercises to build confidence
- Personalized guidance to reach your musical goals
These lessons are perfect for children, teens, and adults who want a flexible schedule without compromising the quality of instruction.
Why Choose Lessons for Violin?
Choosing the right online violin lessons Surrey BC is key to consistent progress and enjoyment. Lessons for Violin provides:
- Experienced, patient teaching tailored to each student
- Convenient WhatsApp lessons accessible from anywhere in Surrey BC
- Occasional in-person lessons for essential technique and posture corrections
- A structured, supportive learning environment for students of all ages
Get Started with Online Violin Lessons Today
Start your musical journey today with professional online violin lessons Surrey BC at Lessons for Violin. Visit www.lessonsforviolin.com to learn more about lesson options, availability, and to book your first online session.
Learning the violin has never been easier — flexible, personalized, and effective lessons are just a call away!